Sunday, May 8, 2011

Wall Niche is Complete

Wall niche finished product.
I really look forward to weekends now that I don't have work six days a week. I got an early start on this weekend and continued working on my living room niche. The trim was cut and nailed in place with finishing nails. The shelves were cut with very little plywood left over from the original sheet.

I sealed all the gaps and corners with caulk and am attempting to sand it smooth.

All that is left now is trim on the front of the middle shelves and paint.

Update: shelves are done. Once the paint dries, the tape comes off the borders and voila! Another project for more prepping space is done.

Of course, the kids HAD to check the shelves for durability by climbing up in them and having a sit.

Now to move on to the next project.

OJD

SHELVING & STORAGE SUPPLIES
A few supplies that make a DIY shelving/niche project like this one easier:
As an Amazon Associate I earn from qualifying purchases.

Saturday, May 7, 2011

Successful Gardening Seeds From SeedsForSecurity.com

Indian Corn (Link to purchase)
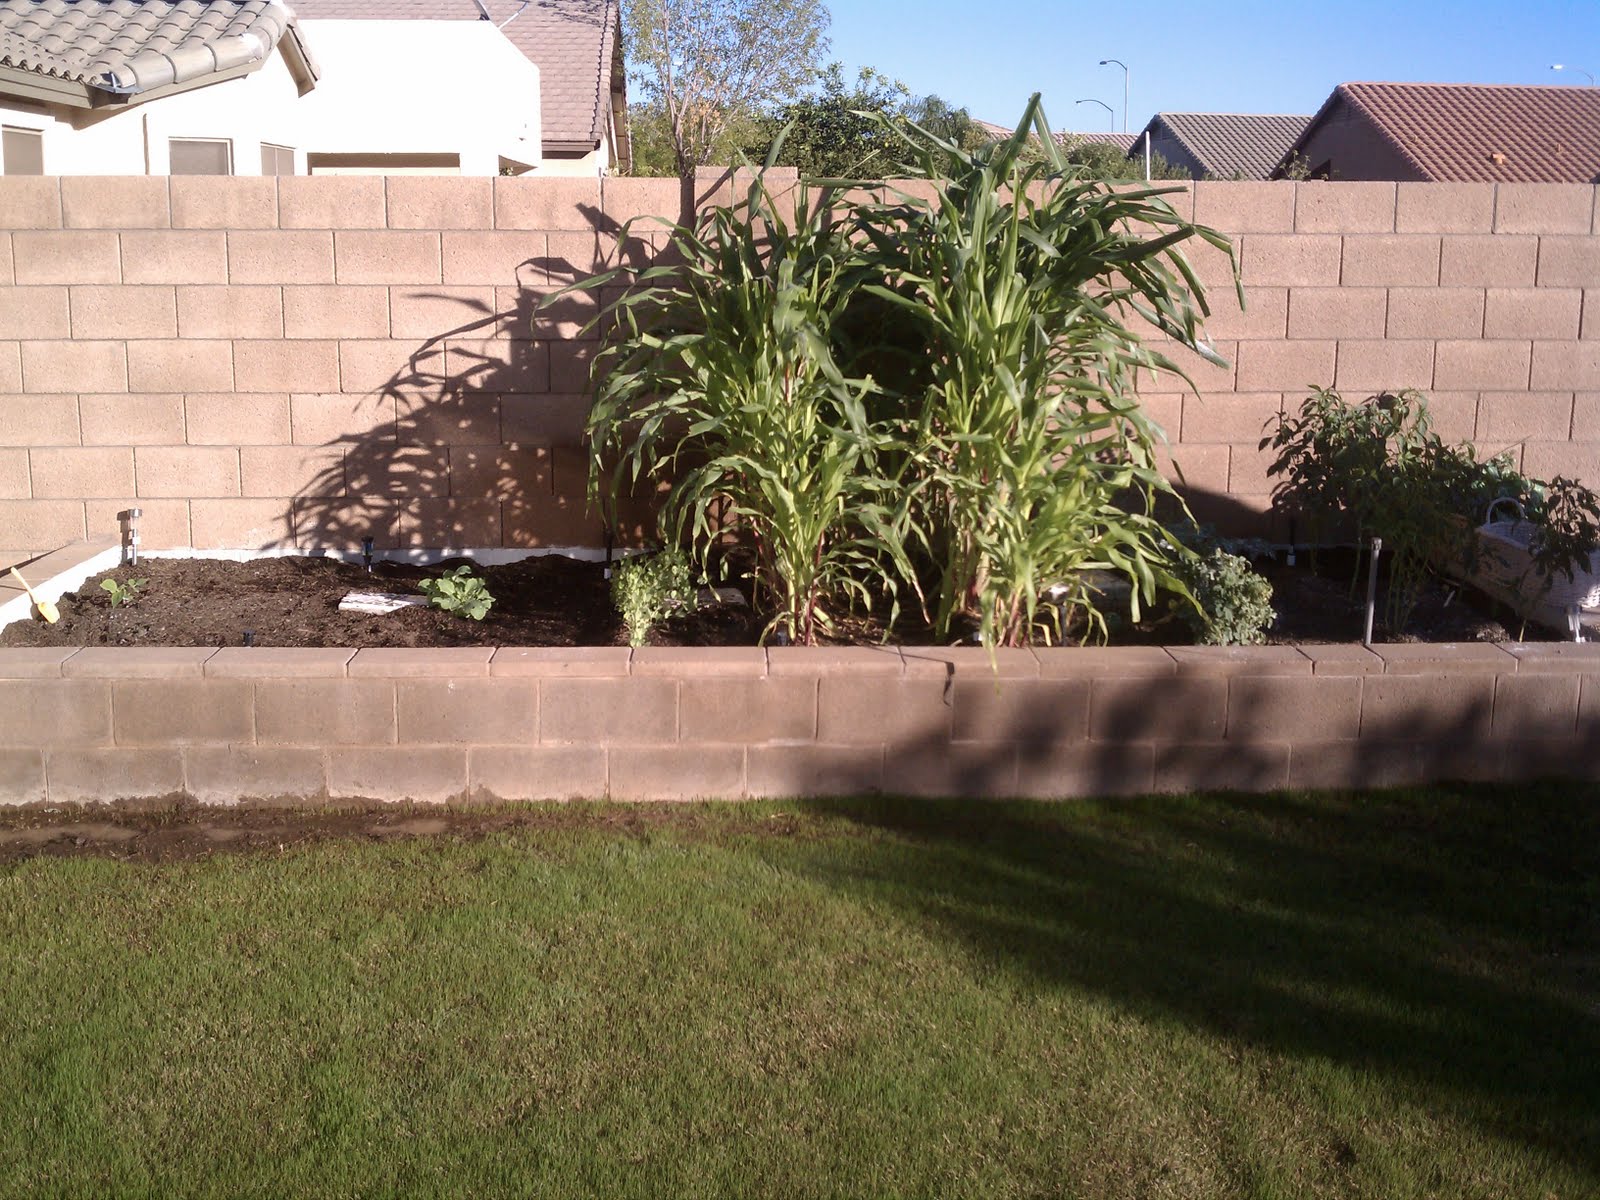
Wifey and I are new to gardening. We have two man-made gardening containers: cinder block pictured below with corn and raised box gardens. These have bags of soil and fertilizer from the local gardening center. Our other backyard garden area is simply hard, Arizona dirt. The same goes from our front yard garden. We purposely plant in both improved and unimproved gardens to see what works and what doesn't.

So far, we've had terrific results. In plain dirt, lettuce (pictured) has done VERY well. The butternut squash is starting to really take off. We have several little ones that play in the dirt and it is possible that seeds get dug up from time to time (or seedlings pulled out.) I covered all raised gardens with bird net to discourage critters and rugrats (cats, birds, and kids).

Most of our seeds were bulk purchased from SeedsForSecurity.com. We didn't know where to get our start in gardening seeds and took a chance on an internet ad displayed at InfoWars.com. We bought the Super Survival Pack.

SeedsForSecurity has turned out to be a terrific source for high quality seeds. We highly recommend them and we are NOT sponsored to say that in any way. Here are some of the plants we have grown using SeedsForSecurity:

 
Early Jersey Wakefield Cabbage (Link to purchase)

Lettuce


Not pictured yet:

peas (Super Survival Pack)

french beans (Super Survival Pack)

cattle beans (Super Survival Pack)

waltham butternut squash (Link to purchase)

cucumber

sugar pumpkin (Link to purchase)

GARDEN STARTER SUPPLIES
If you're getting started with a survival/heirloom garden like ours, here are some helpful supplies:
As an Amazon Associate I earn from qualifying purchases.

Wednesday, May 4, 2011

Using TDSSKiller To Remove The Google Redirect Virus

Google Redirect Virus On The Prowl.
After my refreshing weekend off, I came back to work to find a lovely computer virus waiting on our main Windows PC. I didn't notice it at first. What I DID notice was that every time I did a Google search and clicked on one of the search results, I would immediately be taken to some strange website made to look like a search engine. Problem was, I wasn't trying to get to a search engine.

I began to test my Internet Explorer browser (yes, I don't like IE either) by running some queries. Google search for "drudgreport" netted me several results linking to the Drudge Report. But when I clicked on the result links, I was taken to what looked to be fake search engines. Some even had script error codes on the page, lame script kiddies.

First thing I did was restore the computer to a prior date. This is a low-level fix but has worked at home when the kids accidentally messup some settings. I had worked on this computer last week and didn't have this issue so I restored the computer to a date last week. Rebooted and tried the Google Drudge query test again. Same problem.

Second, I visited Trend Micro's HouseCall and ran a diagnostic. TM is a global leader in cloud security. All you do is download their HouseCall program and run it. It scans the computer and gives a report. If it finds something, it will attempt to fix it. If it can't fix it, atleast you know what the name of the culprit is so you can google it. HouseCall did NOT find the problem and I uninstalled it and deleted the install folder.

TDSSKiller worked in under 3 minutes.
Third, I searched "Google Redirect Virus" and received numerous results. After reading through a few posts, I found a simple narrative on using a tool called TDSSKiller. This is an anti-root kit offered by Kaspersky, a trusted online anti-virus software provider. I downloaded TDSSKiller, ran the program, and within 3 minutes it found the problem and isolated it. A quick pop up told me to reboot the computer so I did. The next time I logged in, I performed several Google Drudge search queries and haven't had a problem since. It worked like a charm. Then I uninstalled the TDSSKiller and deleted the install folder.

And mom said watching Wargames 78 times when I was a kid wouldn't pay off. Pshhahh.

STAY PROTECTED FROM MALWARE
A few tools worth having on hand for situations like this:
As an Amazon Associate I earn from qualifying purchases.

Autorepair: Diagnose The Problem WITHOUT Spending a Fortune.

As an Amazon Associate, Orange Jeep Dad earns from qualifying purchases. This post may contain affiliate links.

Autorepair: Diagnose The Problem WITHOUT Spending a Fortune.

Chilton's Manual: The bible for your car.
I've recently been blogging and commenting about how hard it is to save and prepare when life is lived paycheck to paycheck. This is certainly a common scenario felt by many people. Just when you think there will be a little extra cash after paying bills...another NEW bill pops up: medical bills, automobile repair, house repair etc. I even had a collection company call me, for the first time, about an Anesthesiology bill for when my 5th daughter was born three years earlier. Three years? I finally have some extra money and you want me to pay a medical bill I didn't know about...from three years ago? Nevertheless, I settled for half the amount and paid the bill. Grrr.

So, on that topic, I have had a very unusual problem lately. You know how when you turn your car's blinker (turn signal)  on it makes that tick, tick, tick sound in sync with the flashing lights? Well, my tick, tick, tick was ticking ALL THE TIME! Whether we used the blinker or not, the sound was NON_STOP. Talk about annoying!

I finally pulled over and popped the breaker fuse out of the fuse box. Sure, I had no turn signals now but I had peace and quiet. After dropping the kids off at school, I swung by the car dealership where I take the Suburban for things I can't do myself. I had planned my questions in advance so that I could milk as much information out of the service technicians as possible WITHOUT having to pay the huge "diagnostic fee."

This is somewhere in the shop of every dealership.
I pulled in the service drive and hopped out of the truck. "Hey, have you guys ever heard of a turn signal that keeps making noises even when it's not turned on?" Three guys behind the counter looked at each other and shook their heads. I've peaked their interests. One tech said that sometimes theres a module under the backend of the truck and he crouched down and looked underneath. Nope. Nothing there. Let me go ask Mark!

He walked to the shop area and came back a few minutes later with news that Mark could get under the dash and have it fixed in under 30 minutes. I asked "How much?" The tech said, "Well, its probably the flasher and all total it runs about $250." I said, "No, how much is the cost to have him diagnose the problem?" The tech said "Oh, $107."

So, I've had a Service Technician physically inspect the truck. The mechanic has reported that it is probably the turn signal flasher. I haven't spent a dime and I happily explain I don't have time to wait at the moment so off I go to buy a Chilton's Manual.

The Chilton's Manual, for those that don't know, is the how-to book for your car. You can buy a Chilton's for just about every make, model and year. It goes chapter by chapter through your car and how it is put together. I'll be looking up the turn signal flasher to find out exactly where it is in the truck and how to replace it. A quick call to the automotive parts store reveals that the part for my vehicle is $14. Yup, $14. A quick google search for "2001 Chevy Suburban turn signal relay" shows me several pictures of what the part looks like.

Another option is to google your problem. I searched "my turn signal keeps clicking" and sure enough, there are several entries where people are asking the same question. Sometimes you have to change your wording around to find the results you need but in today's internet age, there aren't many questions that haven't already been asked by somebody somewhere on the internet. Most of my search results have answers relating to the turn signal relay/flasher. Looks like I'm headed in the right direction. If I'm lucky, the automotive parts store clerk will be able to tell me roughly where the flasher is located and I won't even need a Chilton's. Since I've had the truck for over a year now though, I think I'll go ahead and invest in one.

The last bit of advice I'll give is on diagnosing engine lights. My Jeep right now has a Check Engine light on. As I said a few paragraphs ago, the dealership wanted $107 just to diagnose my problem. I learned years ago to use an OBDII engine code scanner ($30.) This is a handheld device that plugs right in to the little computer module that sticks out from under the dash right above where your left leg is when you drive. The OBDII simply plugs in to the port and you turn it on. Then turn on your car just enough that the radio comes on, don't start it all the way to running. The scanner will do a little diagnostic test and show you a diagnostic code on the screen (sometimes more than one code.)

With this code, you can look up EXACTLY what is wrong with your car using the accompanying CD software that comes with the scanner. For my Jeep, the code is P042 which turns out to be related to the catalytic converter. A quick wiki search teaches me that the converter is used for emissions and wasn't used in mass production until 1975. This tells me several things. I don't have a MAJOR repair on my hands that requires me to be without a vehicle so no worries there. It also tells me that I can continue to drive without causing major damage to the engine. Sure, gas mileage may decrease or it may idle a little rough but it will make it until payday and I'm not due for an emission test any time soon. I'll repeat the same process that I used for the Suburban. Search google for forums discussing how people fixed their jeep P042 code problems. Read through my Chilton's Manual and go from there.

In summary, when you have car problems:

1- Drive to (or call) a mechanic (or several mechanics) and find out what they think it could be. I've found that over the phone, they're more likely to tell you to bring the car in so they can see it.

2- Ask the auto parts people what they think. These folks sell the parts to fix everything. They are VERY knowledgeable and their usually happy to help you install it since their vested interest is in simply SELLING you the part, not the labor.

3- Use a $30 ODBII scanner to diagnose your own engine codes. The scanner will pay for itself the first time you use it. I take mine on road trips too, just in case I get an engine light in the middle of nowhere.

4- Use the knowledge of the internet. Search for images of the part you need, where it goes on the vehicle, and what other people have done to fix the problem. Don't forget YouTube. Many users have made videos showing exactly how they fixed it.

The less you rely on other people to fix your car, the more self sufficient and confident you will become...and you're guaranteed to save money in the process.

Tuesday, May 3, 2011

Prepping One Step At A Time...At Alternative Cache Locations.

As an Amazon Associate, Orange Jeep Dad earns from qualifying purchases. This post may contain affiliate links.

I was reading through yet another terrific blog post at Rural Revolution regarding how much cash to keep on hand versus utilizing the current value of cash to purchase tangible assets. It all follows the bigger question of how to prepare for your family when it doesn't seem like there is any disposable income left after bills are paid. The answer: do what you CAN do and find some peace knowing that you are working towards a goal.

Save money by eating simple meals at work: soup & water.
How do you know what you CAN do? Write out a plan. Do the math. Figure out what you need for YOUR situtation and write it down. Then break it up into little steps. One source is the LDS food storage calculator. It says a family of four, for a three month supply of basic food, needs 300 pounds of wheat and 60 pounds of beans/legumes. That's $137.40 in wheat and $89 in beans, according to the LDS Family Home Storage Center pdf file. Total is $226.40 and divide by 12 months gives you $18.87 per month that you need for a (very) basic food supply that feeds four people for three months.

Now of course you'll want more than wheat and beans. This simple meal plan was simply to illustrate how to break down something seemingly daunting into smaller, more achievable goals. There are tons of food lists from all kinds of perspectives listed all over the internet. Find one that suits you and break it down into small, manageable chunks.

Food storage: start with a little and keep adding.
I need more space to store food, for example. I realized I had an empty locker at work which would make a great place to store a little canned food. Since I spend a lot of time at work and therefore eat meals at work, it makes perfect sense for me to store food there. It gives me more storage space AND decreases the chances I'll run out for a burger or tacos knowing that I have food already here. I can't afford to just run to the store and buy 30 cans of Campbells Chunky soup to fill my locker so I'll start with a few cans and add from there. Small steps towards a bigger goal of filling the locker.

Make a plan and get started...TODAY!

Building Out Alternative Cache Locations

Spreading supplies across a few alternative cache locations only works if the containers themselves hold up. A sealed waterproof storage container keeps moisture and pests out of a buried or hidden cache, and vacuum sealed mylar bags keep food and supplies fresh for years inside those containers. One step at a time really does add up to a solid, distributed plan.

Beans Replace Carrots in Our Raised Box Gardens

Jacob's Cattle Beans from SeedsforSecurity.com
After planting some new seeds on Saturday, wifey and I decided to re-plant some things in our raised box gardens. Each box is 3'x3' accomodating a good 5-6 rows of seed. Two of our boxes were filled with carrots and for reasons uncertain, we have ONE sprout in each box. Our seeds sat just under the soil surface for over a month before I covered them with bird net. I suspect either faulty seeds, scavengers (birds,cats), toddlers (who thought the gardens were sandboxes) or improper watering techniques...or all the above.

Regardless, after checking our growing chart, we planted bean seeds in both boxes and were careful not to distrurb our lonely little carrot sprouts. I didn't see any budding carrot seeds while planting the beans. One raised box got French Horticulture Beans and the other box got Jacob's Cattle Beans. 90% of our seeds come from Seeds for Security. We've learned that seeds bought on sale at dollar stores don't do as well as our Seeds for Security heirlooms. Like the carrots for example. I wanted to try purple carrots and the only place I found seed was online. Turns out they came from Sweden?

I managed to make it to Home Depot to buy trim, finishing nails, and some epoxy/putty to fill in the cracks on my wall niche project. I ran out of time before I could actually use the items though. So I tucked the supplies away, in the garage, out of reach from the little ones. I'm looking forward to finishing the project and seeing how much stuff the shelving will hold.

I was graced with a visit by a carpenter in our ward. He was adding a walk-in pantry to a home across the street and needed to borrow my razor knife. I coaxed him in far enough to see my handy work. It was painful to see him stammer for words to describe my first carpentry project but I was still proud just the same. He admitted that most of my inaccuracies could be covered with trim and I was happy to hear it.  The way I see it, with six daughters, I would rather learn how to do this stuff now on my house than to booger up my girls' houses when they need help. I have to admit, coming from the medical field, this building stuff is kinda fun too.

Mystery plant in the potato garden.
I found something growing in the potato garden although I'm not too sure it's a potato. It is growing right up next to the sprinkler head and looks to be the only thing growing among the store bought potatoes that I cut up and planted.

Now I just have to figure out when its time to harvest everything.


RAISED BED GARDEN SUPPLIES
A few things that help with a raised box garden like ours:
As an Amazon Associate I earn from qualifying purchases.

Monday, May 2, 2011

Adding Storage With a Wall Niche


Two niches cut into the living room wall (while the kids
watched an episode of Barney)
 Saturday was a very productive day at the Compound de Orange Jeep Dad. The oldest two daughters were dropped off at church by 7am. They spent a good part of the day volunteering at the Special Olympics in Mesa. Teenage enrichment activity...check.

Back home by 7:30 and planted pumpkins in the front flower bed. If calculations are correct, we should have PLENTY of pumpkins by halloween. Saving money on future halloween decorations and pies...check.

Planted cucumbers and watermelons in the backyard. Down to one small area of EMPTY garden now. Once it is gone, I may start re-planting in the raised box gardens if I don't see more growth from the carrots. Future veggies to munch...check.

Lots of space added where there used to be none
Then the biggest chore of the day. On the recent topic of extra storage, wifey asked me to add some shelving next to the main television. In my usual research fashion, I visited youtube for a quick lesson in carpentry. Turns out what I'm about to create is called a "wall niche."

The rest of the day was spent sawing, nailing, and arguing with wood. The shelves are in. Next will be sealing seams, a final sanding, and painting the finished product. Oh, and BIG trim to cover up my mistakes.

Improving sadly lacking carpentry skills...check.

Update: Wall niche is complete. Click here for the final pictures.

WALL NICHE & SHELVING TOOLS
A few basics for a DIY wall niche/shelving project like this:
  • Stud Finder — helps locate wall studs before cutting.
  • Drywall Saw — for cutting clean niche openings.
  • Wood Filler — for sealing seams before sanding and painting.
As an Amazon Associate I earn from qualifying purchases.

The Art of Shaving

In my dream world, I shave about as often as a Roberts man in all my Duck Dynasty glory. In the real world, I have a job that requires me to...